
White Balance Instructions
These instructions are for example only. The following general instructions apply to most video and still cameras. You must, of course, read the camera manual that came with your camera.
White Balance Preset Switch
There are four possible white balance modes with this switch:
Auto 1 White Balance Memory 1 is fixed in this position. If a white balance is performed with the switch in this position, it will be memorized.
Auto 2 This can be selected during camera set up (in a menu routine) as a second memorized white balance OR as Full Time Auto White Balance in which samples are taken of the color temperature of the video image. This Automatic white balance can be fooled.
Preset This is a non-erasable or permanent White Balance setting of 3200 degrees Kelvin which is the color temperature of normal indoor incandescent lights. If you’re shooting inside under 3200 K lights use this AND make sure your internal lens filter is set for clear. You cannot do a manual white balance with the switch on Preset.
How to Manually White Balance
1. Set the Iris to Automatic (AUTO) or Manual depending on the subject.
2. Fill the screen with a white object placed in the position as the subject, and lit by the same primary lighting as the subject
3. If the filter wheel has not been set for the current lighting color temperature, do so now.
4. Press the White Balance switch momentarily. “Completed” will show in the viewfinder.
In most cases it’s obvious what is the primary light, but there are times when the overall ambient light is prevalent compared to the key primary light so look carefully at your set up. White Balancing under a mixture of lights is fine as long as you are consistent. Let’s say your subject is lit by a combination of ambient daylight and your 3200 K movie lights. The color temperature your camera reads when it white balances this mixed source may be 4000 K. You can white balance this color and the flesh tones of your subject will look just fine. You shoot the first part of the interview and then need to go outside and film a short once-in-a lifetime scene. Your break for lunch then return to finish the interview.
When you started the interview, you made a white balance and memorized it as Auto 1 white balance. But now you think the outdoor light that partially lit the interview has probably changed and that may have changed the color temperature. To be safe you would want to white balance again. Keep the white card in the same position you used the first time. By doing a new white balance, you are insuring that the flesh tones of the first interview session will match those of the second session. However, the color of the background may be slightly different. The human eye may not notice this difference in real life, but it may jump out like a sore thumb in a photo or video.
The color temperatures of shooting outside can be tricky because unlike shooting inside under controlled lighting, the outside sky can be continually changing. Even when the sky is not changing, the amount of shade present can radically alter the color temperature even though the difference to the naked eye is indiscernible. The difference to a video camera can be vast. Here are four shots all done with the same white balance under a completely overcast sky. The shots were taken within 10 minutes of each other and the overcast sky did not change at all during that time.
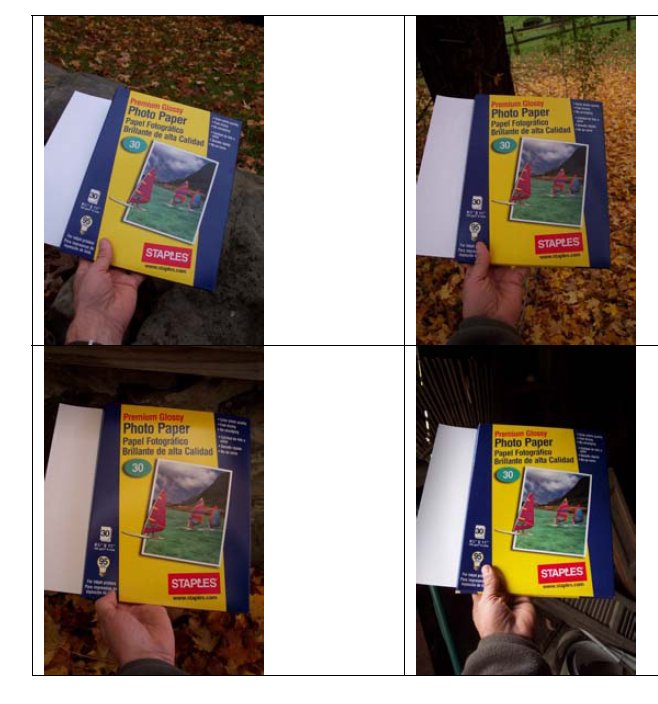
You can see that the amount of shade alone changes the color temperature. Moral of the story: Always do a new white balance any time you even think there may be a slight color difference. Incidentally, notice the lighting in the fourth shot. That picture was taken just a couple feet inside a barn with the daylight entering from the open door. Notice the soft shadow on the hand and how the subject stands out from the background. Vermeer and Rembrandt created many of their best paintings in this kind of lighting.
A Clever Way to Control Color Using the Rembrandt Card
Our Rembrandt Card is a blue card that can be used for white balance when you want more of a pleasing warm look. The following is an example of white balance with a white card and then a white balance with our blue Rembrandt card.
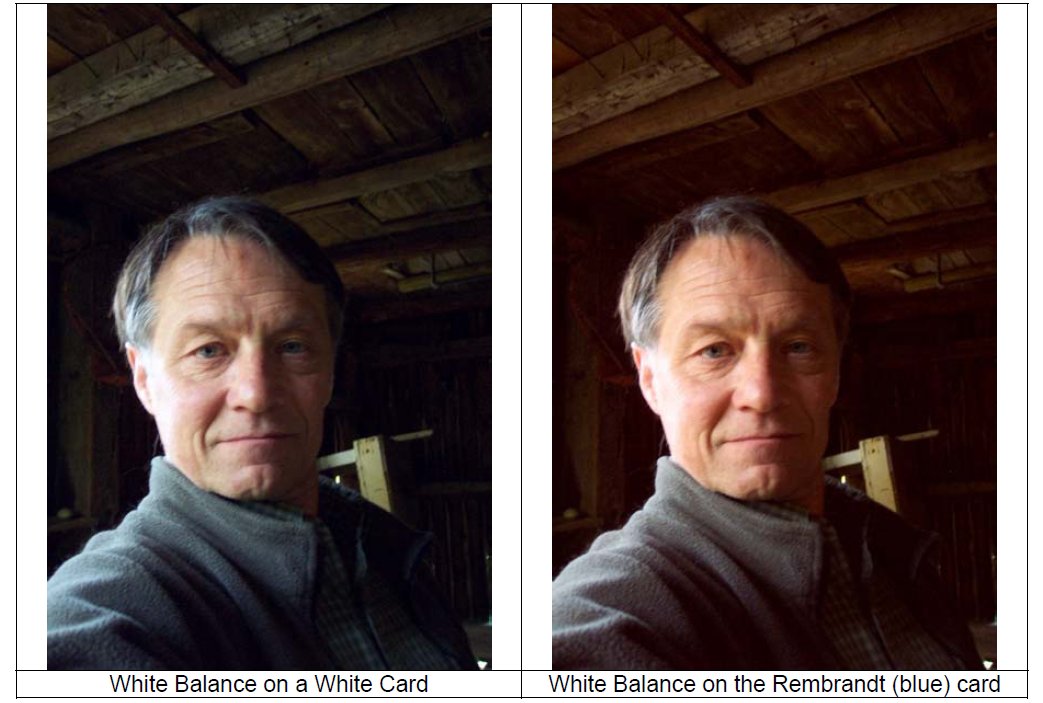
The only difference between the two shots is that the first one is white balanced with a white card and the second one is white balanced with our Rembrandt Card (which has a slightly cool or blue color). Of course a vital factor in the appearance or precise colors will depend on your viewing
circumstances. The monitor on which you view these photographs can be changed by turning color contract, tint, etc. So what are the real colors? In video this can only be regulated with the use of standard color bars. See the article Color Bars and How To Use ’em at http://www.videouniversity.com/articles/color-bars-and-how-to-use-em
The Standard Operating Procedure in shooting any professional video is to record at least 30 seconds of color bars on the beginning of each tape you shoot. These color bars must then be used on every monitor used to edit or process that videotape. Otherwise you have no control over the colors. When possible, those same color bars must also be used to adjust the monitors which will view the finished video.


Recent Comments