
by
Jerome Cloninger
JC/DV Productions
http://www.jcdv.com/shoeadapter.htm
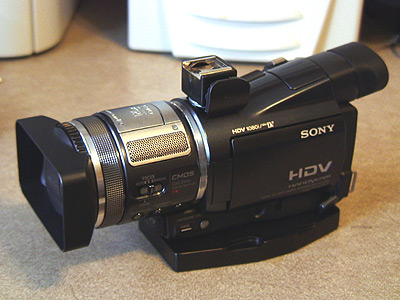
After searching hours on the net to find a sturdy method of converting the IAS shoe on the Sony HDR-HC1, I managed to build one in about 1 hour. Then making the 2nd one only took 15 minutes.
This is VERY simple, and almost anyone could do it. Modifying your camera is at your discretion. Although there isn’t any physical adjustments performed in this procedure, adding heavy objects might cause damage to the IAS shoe and I am NOT RESPONSIBLE!
Parts Needed:
1 – 1/4″-20×1″ Carriage Bolt
3 – Washers
1 Bower Screw Mount Shoe (got mine from B&H)
ALL PARTS HERE:
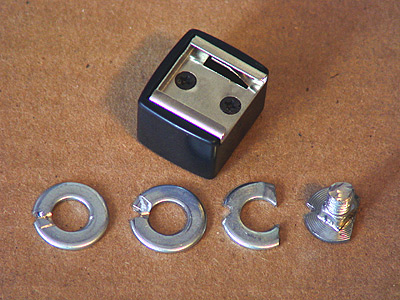
They have been modified already, but you should have the idea.
Equipment Needed:
Grinder
Dremel Tool w/cutting wheel
Small Flat Screwdriver
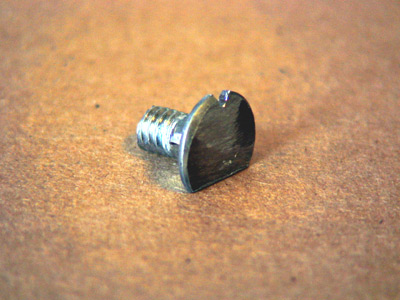
STEP 1: Grind the round edge off of the carriage bolt making it have a flat head.
STEP 2: Grind 1/4 of the round edge to make it flat.
STEP 3: Using the Dremel, cut a small “V” opposite the flat side of the head.
STEP 4: Cut approximately 3/8″ from the base of the head using the Dremel tool. I used large channel locks gripping the base and cut even with them.
You should now have something like this:
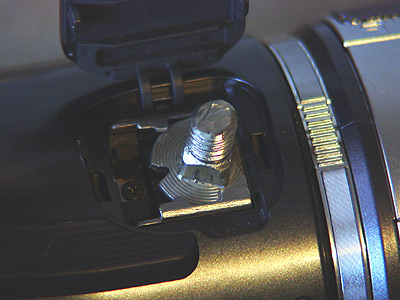
STEP 5: Insert the head into the IAS shoe with the “V” in first on the left side. Flat side should slide nicely into the IAS well. Rotate the bolt counter clockwise until the flat edge fits snugly at the front wall of the IAS shoe.
Should look like this when properly inserted.
STEP 6: Notice at there is a small ridge at the front, if you cut too much (as in this one) it is OK, just cut the washer so that it will rest flat on the IAS rail and NOT on the camera housing body. The first one I did was OK, but this one needed the modification (if you don’t do this, and the washer is on that ridge, you may crack the plastic housing/ridge!!!), so you should have something looking like this:

Make sure you have the notch in the back! You’ll need this in a minute.
STEP 7: Insert the next 2 washers on top of the first one. This provides clearance of the non-threaded square part of the bolt.
STEP 8: Screw the Bower screw mount onto the bolt. As it gets tighter, line up the washers AND MOST IMPORTANTLY use a flat screwdriver (skinnier the better) and insert into the notches on the bolt and washer. Then finalize screwing in the shoe mount. Using the screwdriver to hold the washer keeps it from rotating out of place. IF this happens, it will not hold securely. IF the shoe doesn’t line up, use the Dremel to shave some of the plastic off the base of the mount and/or the bolt and you can get it to line up, yet being snug & tight. Remove the bolt before using the Dremel, you don’t want metal bits flying around your camera!!!
You should have something like this:
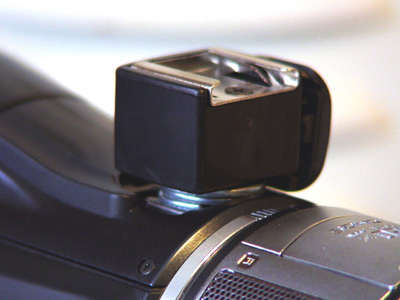
AND
I may use a black o-ring to secure the IAS lid tight to the mount to keep from clanking around or just cut it off. I will also find a large black grommet to insert between the mount and inside the IAS shoe well so you can’t see the washers and to keep dust from gaining entry.
Good luck!


Recent Comments