Transferring negatives and transparencies can be a challenge if they are not typical sizes. Those that are typical sizes like 35mm, 120 and 126 can be scanned using a good flatbed scanner. But other sizes require a different approach. One recent job was all negatives, some going back over 100 years! Flatbed scanners like mine that scan negatives or transparencies have special holders which position the negatives to be in a particular place on the flatbed. This enables the light source to be from the top rather than the normal light from the bottom. Much more expensive scanners like the The Epson V800 has a scan area for negatives of 8.5″ x 11.7″, but the cost is $900. So unless you are doing a lot of negatives or transparencies, this is likely to be too expensive.
The alternative is to use a camera and a light table. This approach requires more care, but can yield excellent results. Unless you are willing to move the camera up or down for different sized shots, you will want a zoom lens. To keep the resolution high, you need to zoom in to fill the frame with the negative. The goal is to not move the camera between shots. So it’s best to organize the negs into similar sizes. By not moving the camera at all, you can keep refocusing to a minimum.
The light table cannot be an ordinary light table because the light from typical light tables is not perfectly even. It will be brighter closer to the light source underneath. The ideal light table is LED powered so the light is perfectly even. And you want a consistent color temperature and no heat. I can recommend the Kaiser Slimlite Plano 5000K Battery/AC Lightbox (10.5 x 15.5″). It’s about $150 from B&H. It’s very thin and never gets warm so it’s perfect for this use.
You will want a piece of very clean clear glass to keep the neg or transparency perfectly flat. Focus is critical so use all the tools your camera provides to help with focus and do some tests.
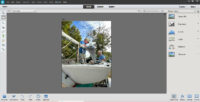
Photoshop or another photo editor will also be needed. In the case of negatives, you will need to invert the photograph so it is a positive rather than a negative. In the case of black & white negs, you will probably also want to adjust the levels. This is easy in Photoshop and gives instant feedback so you know when the photo looks good. Both invert and levels are in the Image/Adjustment part of Photoshop. This is one time where it seems to be faster to do this work in Photoshop rather than with Photoshop Elements, but Elements is also a great program. The “Smart Fix” tool in Photoshop Elements is amazing and saves lots of time for any image processing.
To do these transfers with a camera, turn off lights in the room which will avoid any reflections from the glass. Use a heavy tripod or an adjustable copy stand. Use the camera’s timer delay to prevent any vibration. Make sure the camera is perfectly parallel with the negative so there is no parallax error which would change the shape from a rectangle. A small bubble level will help.
Transferring negatives and transparencies is a service that makes sense for companies that transfer videos and films. It may not be as popular a service as video, film, photos and slides, but it does not require a great investment.


Recent Comments