

Google Photos is the best cloud photo storage site that makes backing up and organizing your photo library very easy. It’s remarkable how well it identifies people in your library even as babies. It also makes automatic GIFs and movies from your photos. You can get out of it at any time. Just go to Google Takeout and download your entire collection.
I transfer photos, slides, videos, films and more for other people. When I deliver one of these jobs, I always recommend Google Photos. When you get 1000 or more photos on a thumb drive, you will want to give some thought to organizing them. Google Photos can help you get organized.
There is a Google Photos Help site, but it doesn’t really explain it the way you might have wanted. Hopefully this article will help you get started.
Transferring From Another Photo Service or Device
For some this may be the hardest part, but it’s definitely worth it. You only have to do it once.
Apple Photos
If your photos are on an iPhone or Mac, just install the Google Photos app. It couldn’t be easier. On an iOS system, the app will automatically start backing up your Google photo library. If you’re on a Mac, just point to the folder where your photos are stored.
With Apple’s iCloud Photo Library, your photos may be visible on your devices, but stored only on the cloud. If you’re using the Apple iCloud Photo Library, Google Photos might be unable to see or upload your photos and videos. If this is the case, just make sure every photo is actually saved on your iPhone or Mac.
On a Mac, Open Photos app. Then Choose Photos > PreferencesSelect “Download Originals to this Mac.”
On an iPhone go to Settings > [your name at the top of the screen] > iCloud > PhotosSelect “Download and Keep Originals.”
Android
When you sign up for Goggle Photos, your Android photos are automatically transferred.
Windows 10
Google Photos must be accessed through a web browser if you are using Windows 10. But there is a handy tool for uploading to Google Photos from the Windows 10 desktop. It’s called the Desktop Uploader. It’s available at the Google Photos’ website. After you’ve downloaded Desktop uploader, install it, and enter your Google Account login credentials. It will then ask you which folders have your photos. When you click OK, the photos will automatically be uploaded to Google Photos.
Your photos could also be stored in numerous other locations and devices. I won’t go into to all the possibilities, but for most you can Google specific instructions or even third party apps to get it set up.
Your Choices
The most important choice to make is backup quality: optimized or original. Most people choose Optimized because it offers unlimited storage for free. And it’s ideal if you will be sharing your images online through email, social media, etc. Google accounts come with 15GB of free storage.
But if you may some day want to print photos for a photo book, or just want to archive all of your media at full resolution, choose “original.” This will eventually go over the 15 GB limit so you’ll likely need to upgrade to get more room in the cloud. Buy more storage – 100 GB for $1.99/month or 1TB for $9.99/month.
Flexibility
Google Photos gives you flexibility about when backups happen. You can tell it to only back up over Wi-Fi in case you need to watch data usage on your phone. Google Photos can also be directed to only do backups while your phone is being charged. This will minimize battery use.. You could also set Photos to back up pictures at any time with cellular data but to wait for Wi-Fi for video uploads.
Choose which folders Photos backs up by going to settings, then “Back up & sync,” and then select “Back up device folders” to toggle folders on and off. You might have photos as screenshots, downloads, Instagram, or others.
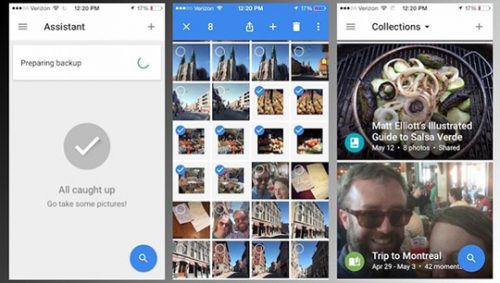
The Amazing Assistant in Google Photos
Google Photos does a lot of work for you completely automatically. For instance: if you shot pictures in a museum or vacation spot, Google Photos will recognize that all those pictures were taken in the same location. It will then automatically create an album for all the shots from the same location or event. If there’s a sequence of similar images, Google Photos will usually make an animated GIF out of them. And it will create movies complete with music track. Not bad for something that requires no work from you.
To see them, just click the Assistant tab in Google Photo. You can choose to save these creations or delete them if Google made something that looks strange as it occasionally does. But you’ll be surprised how often these automatic creations will delight you.
Find All Pictures of Dad, Grandma, or Jason
The search function in this app is awesome. Find all the photos of any specific person. We probably shouldn’t be surprised that the most accomplished search engine on the planet can also search photos for people, places and events. It does this very well and very quickly. Naturally it can do more basic searches such as all of – photos from last year’s birthday, your selfies, your cat and just about anything you can think of. This stunning power will be very useful to those of you who have just had thousands of photos or slides transferred to digital. The search is lighting fast.
You can also search for types of files like TIFFs, mpg4, 360 video and more.
The Easy Way To Make Animated GIFs With Google Photos
The standard way to make animated GIFS is by using Photoshop. It’s not that hard, but Google Photos makes it extremely easy. Just choose the sequence of images you want, hit the “plus” icon, and choose animation. See what I mean? The sequence of photos can be any photos in your library. They don’t have to be next to each other.
Make a Movie is Just As Easy
To automatically make a movie, just choose the images and videos you want, hit the “plus” button. This movie making capability is only available with the mobile app version of Google Photos. The movie making can be completely automatic or you can take control and edit exactly as you wish.
Share An Album
To share photos from a special event, simply click the album to share and then enter email addresses. The recipients don’t have to have a Google account. There’s also a new type of album called “shared Album” where those you share with can also share their own photos if they have their own Google account. Sounds like a simpler version of Facebook, but it’s not.
Is Your Phone Full of Photos and Videos?
These media should have been saved to your Google Photos Account. I would check to be sure, but when you are, you can free up space on the phone. In Google Photos, go to the side menu and choose “Free Up Space.” It knows what has been archived and what is safe to clear off your phone. Then just click “Remove.”
Photo Editing
There’s a built-in photo editing tool that will do a good job for basic touch ups. It can correct the while balance colors and saturate blue skies without changing the saturation of the entire shot.


Recent Comments